Access .NET Hosted on IIS from Java |
|
This example demonstrates how to access .NET Hosted on IIS from Java client. J-Integra® for .NET is a Java interoperability component that bridges Java/J2EE and Microsoft .NET. It provides bi-directional access of Java objects and .NET components.
Use this example as a guideline to show you how to access a Client Activated Object (CAO) in a .NET Assembly that is hosted in Microsoft Internet Information Services (IIS) from Java using J-Integra for .NET.
The Steps to Follow will show you how to deploy J-Integra® for .NET correctly for this example. Refer to the diagram below for an overview of the scenario:

A platform with Microsoft Visual Studio .NET 2003 (7.1.3088 or higher) installed, or at least the .NET Framework 1.0.3705 or higher. This will be known throughout the example as the .NET platform.
A platform with J-Integra for .NET 1.5.1265 (or higher) installed. This will be known throughout the example as the Java platform.
A version of JDK installed on the Java platform, and the bin directory included in the path. This required to compile the Java proxies.
Verify that GenService is installed correctly on the .NET platform.
IIS 5.0 (or higher) on the .NET platform.
Perform this step on the .NET platform.
In this step, you will need to compile the .NET code.
Load HelloWorld.sln located in $USER_INSTALL_DIR$\examples\java_iis\HelloWorldServer with Visual Studio .NET 2003. Press F5 to build. If successful, this should build a .NET Assembly HelloWorld.dll in the bin directory.
Perform this step on the Java platform.
In this step, you will use the GenJava tool to generate Java proxies from the .NET Assembly.
Launch GenJava from the Start Menu.
Change directory to $USER_INSTALL_DIR$ and then enter:
java -jar lib\genjava.jar
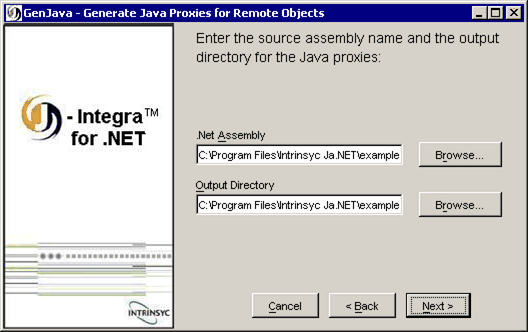
The first screen of GenJava
prompts for the location of the .NET assembly along with the output directory
where the Java proxies will go. They should be (respectively):
- $USER_INSTALL_DIR$\examples\java_iis\HelloWorldServer\bin\HelloWorld.dll
- $USER_INSTALL_DIR$\examples\java_iis\HelloWorldClient

Move on to the next step by clicking Next.
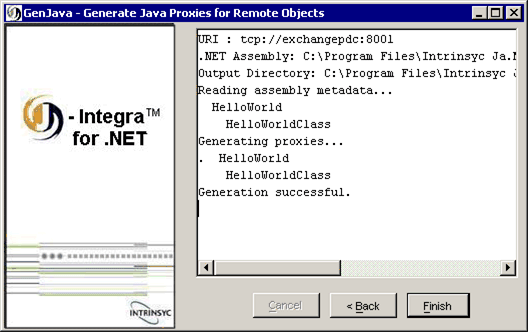
You should see a message that the proxy generation was successful. Click Finish to exit GenJava.

To compile the Java proxies, at the command-line, change directory to $USER_INSTALL_DIR$\examples\java_iis\HelloWorldClient and enter:
javac -classpath $USER_INSTALL_DIR$\lib\janet.jar;. HelloWorld\*.java
Perform this step on the .NET platform.
In this step, you will need to configure and deploy the .NET Assembly in IIS so it can respond to HTTP requests.
Along with Java proxies, GenJava generates .NET configuration files to be used as templates - one for the HTTP channel (web.config) and one for the TCP channel (remoting_tcp.config). As the .NET Assembly is being hosted by IIS, .NET will use web.config. You can find this in the same directory that the proxies were generated in.
Modify web.config to look like:
<configuration> <system.runtime.remoting> <application> <service> <activated type="HelloWorld.HelloWorldClass, HelloWorld"/> </service> <channels> <channel ref="http"> <serverProviders> <formatter ref="binary" typeFilterLevel="Full"/> </serverProviders> </channel> </channels> </application> </system.runtime.remoting> </configuration> |
Go to Start > Programs > Administrative Tools > Internet Services Manager.
Right-click on the Default Web Site node and create a new virtual directory. In the Alias field, enter HelloWorld.
Browse to and select $USER_INSTALL_DIR$\examples\java_iis\HelloWorldServer as the directory.
Make sure that the Default Web Site is started.
Perform this step on the Java platform.
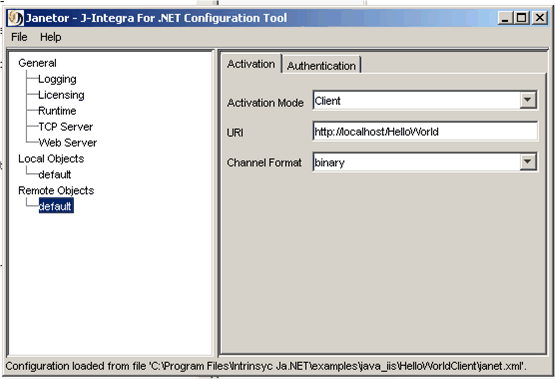
In this step, you will need to configure J-Integra for .NET to act as a client to access the CAO in the .NET Assembly. This is done through the Janetor tool.
Launch Janetor from the Start Menu.
java -jar $USER_INSTALL_DIR$\lib\janetor.jar
Go to File - Open and open janet.xml located in $USER_INSTALL_DIR$\java_iis\HelloWorldClient.
Install your J-Integra for .NET product license. See Installing the J-Integra® for .NET license for further information.
Select default under Remote Objects. Here you see that J-Integra for .NET is configured as a client to access a CAO at the given URI, using HTTP binary. The URI is determined by the address of the IIS machine along with the virtual directory name chosen.

Before you exit Janetor, save the configuration by going to File - Save.
Perform this step on the Java platform.
In this final step, you will compile and run the Java client.
At the command-line, change directory to $USER_INSTALL_DIR$\examples\java_iis\HelloWorldClient and enter:
javac -classpath $USER_INSTALL_DIR$\lib\janet.jar;. HelloWorldMain.java
To run the client, in the same directory enter:
java -cp $USER_INSTALL_DIR$\lib\janet.jar;. HelloWorldMain
You should see the following output:
Hello World, from Fred
|
© 2007 Intrinsyc Software International, Inc. All rights reserved. Legal |