Deploying J-Integra (Native Mode) Applications with Java Web Start (JWS)
There are a few issues to be aware of when deploying J-Integra (native mode) applications using JWS. Depending on your application, one or more of the following DLLs must be deployed to the target machine:
| DLL |
LOCATION |
| ntvauth.dll |
%JINTEGRA_HOME%\bin |
| ntvauthEnglishResourceDll.dll |
%JINTEGRA_HOME%\bin\international |
| ntvinv.dll |
%JINTEGRA_HOME%\bin |
| ntvinvEnglishResourceDll.dll |
%JINTEGRA_HOME%\bin\international |
| ntvocx.dll |
%JINTEGRA_HOME%\bin |
Issue #1: JWS does not support subdirectories in its jar structure. You will need to make sure that the above DLLs are all included in a JWS jar file, and are all in the same directory (see 'option 1' below for more details).
Issue #2: Due to security restrictions built into JWS applications, you may need to explicitly load one or more of the above native libraries. Make the following loadLibrary() calls at the start of your Java code (before any native libraries are automatically loaded by your application):
try {
  System.loadLibrary("ntvinv");  // if using native mode
  System.loadLibrary("ntvauth"); // if using native authentication
  System.loadLibrary("ntvocx");  // if embedding ActiveX in Java
} catch (Throwable t) {
  ...
}
|
* Note: It is not yet clear precisely which set of conditions results in the above calls being necessary. Some of our customers have reported needing this, and others have not. If you are getting the "0x8000ffff - Catastrophic failure" error, try adding the above code to your Java client.
Adding Native Libraries (DLLs) to Your JWS Deployment Application
Option 1
Specify the java.library.path property to include the directory with the native libraries. For example, if the native libraries are located in c:\jintegra\bin, run your application like this...
java -DJINTEGRA_NATIVE_MODE -Djava.library.path=c:\jintegra\bin MyMain
By doing this, the system PATH environment variable does not have to contain an entry for the location of the native libraries.
Option 2
The JWS Documentation contains a section on including native libraries with your JWS application. Here is an excerpt...
A nativelib element specifies a JAR file that contains native libraries. For example:
<nativelib href="lib/windows/corelib.jar"/>
The JNLP Client must ensure that each file entry in the root directory of the JAR file (i.e., /) can be loaded into the running process using the System.loadLibrary method. Each entry must contain a platform-dependent shared library with the correct naming convention, e.g., *.dll on Windows, or lib*.so on Solaris/Linux. The application is responsible for doing the actual call to
System.loadLibrary.
Native libraries would typically be included in a resources element that is guarded against a particular operating system and architecture. For example:
<resources os="SunOS" arch="sparc">
<nativelib href="lib/solaris/corelibs.jar"/>
</resource> |
For instance, you can put all the required DLLs, ntvauth.dll, ntvinv.dll, ntvocx.dll, ntvauthEnglishResourceDll.dll and ntvinvEnglishResourceDll.dll, into a jintegraNative.jar file without any subdirectories, and the JNLP code would be:
<resources os="Windows">
<nativelib href="jintegraNative.jar"/>
</resources>
The attachment jws.zip contains an example of deploying J-Integra native mode application with Java Web Start. The application embeds Adobe Acrobat Reader in a Java frame. No system CLASSPATH or PATH environment variables need to be configured.
First of all, for debugging purpose, enable console of Java Web Start by clicking File > Preferences > Advanced and then select the checkbox Show Java Console.
Make sure that you installed JDK 1.4.0+ and Adobe Acrobat Reader 6. Unzip the attachment JWS.zip to a directory, for example Z:\Test\JWS. Install your license of J-Integra into jintegra.jar, and move the jintegra.jar file to Z:\Test\JWS.
Move all required DLLs to Z:\Test\JWS
\bin\ntvauth.dll
\bin\ntvinv.dll
\bin\ntvocx.dll
\bin\international\ntvauthEnglishResourceDll.dll
\bin\international\ntvinvEnglishResourceDll.dll
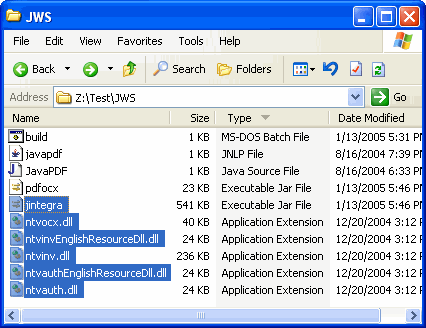
Now the directory should contain all the files as shown below:

Open javapdf.jnlp from a text editor. In my example, all my files are in Z:\Test\JWS direcory, so the javapdf.jnlp file contains this line:
<jnlp spec="1.0+" codebase="file:///z:/Test/JWS/">
You will need to modify the above code base according to where you plan to run the example from. Then save the javapdf.jnlp and close your text editor.
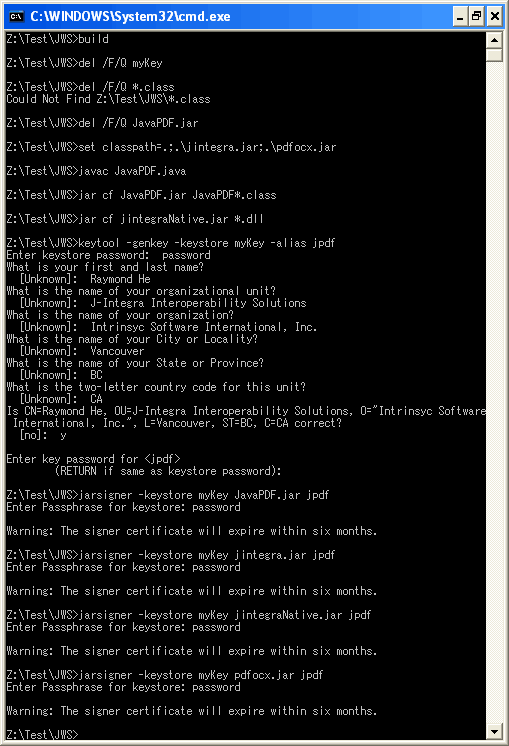
Double click the build.bat file. When you are prompt to enter a password, make sure you enter the same password you created previously. You can arbitrarily enter the other information. The screenshot below shows the output of running build.bat, and the word "password" is used for all the passwords:

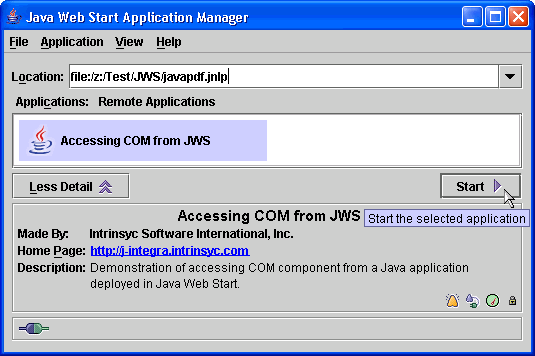
Now you can launch the application by double clicking the javapdf.jnlp file or using Java Web Start Application Manager:

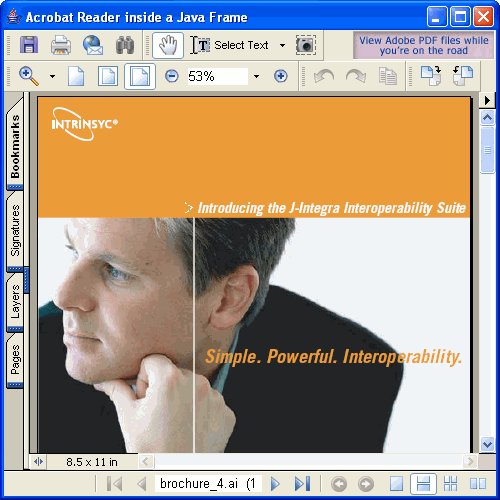
Then you should be able to see a window similar to below:

You can also install a web server and modify javapdf.jnlp to deploy the application over HTTP. More information can be found from Sun's website: