Step #1 - Addin Overview
The Brewer Toolwindow can be made visible be clicking Tools -> J-Integra® Espresso. This menuitem toggles the visibility state of the toolwindow.
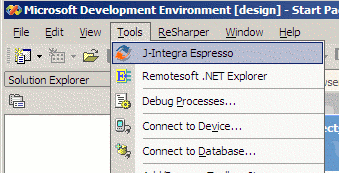
After executing the "J-Integra® Espresso" command you will be presented with a
tool window similar to the following image.
Note: The icons and top drop down box will appear grayed out if no project or
solution is loaded. Loading/creating a solution will enable the toolwindow.
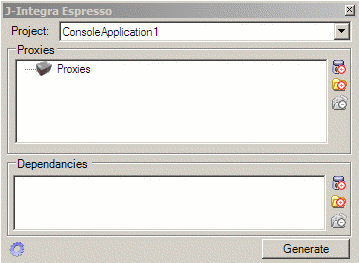
The toolwindow consists of several major sections and below is a quick overview to each one.
- Project: Selects which project you wish to generate or configure the proxies for. The Brewer addin supports multiple projects per solution maintaining and generating a unique set of proxies for each project. Settings for each project are saved in the project's folder under the filename: espresso.isi
- Proxies: Shows the available classes and selected classes. If a class doesn't have an available checkbox this is because the class was unable to load. Please ensure that all necessary dependant classes/files are added.
- Dependancies: Lists all the added dependant files.
- Generate Button: Regenerates proxies for the selected classes.
Step #2 - Selecting your proxy sources
Add and select the desired classes for proxy generation.
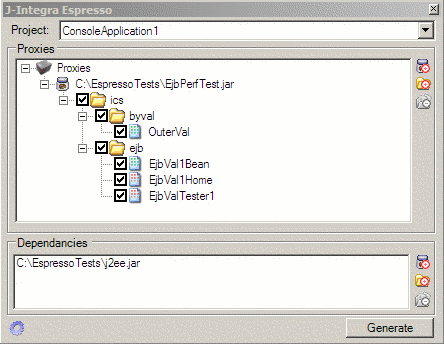
Source files can be added to either the Proxies or Dependancies sections. In either case, they can be added by one of the following methods:
-
Right Click Context Menu: Right clicking on specific nodes allows for
deletion or you may add proxy sources.


-
Icon Buttons: The following icon buttons are available on the right side
of the toolwindow for the proxies and dependancies sections.

Add Jar/IDL File
Add Directory
Remove Item
Step 3: Configuring Proxy Output
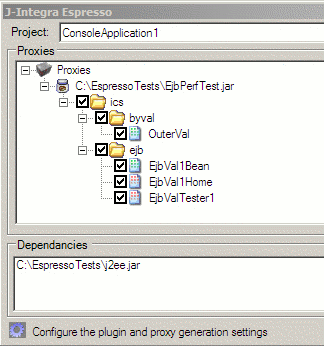
Click the gear shown above, located in the bottom left corner, will bring up the Settings dialog where all the options can be configured.
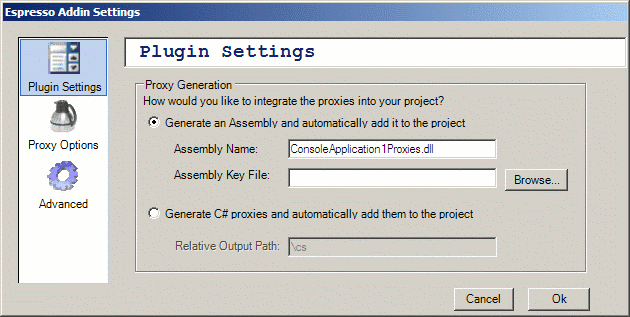
The "Plugin Settings" tab controls the proxy generation output type: .NET Assemblies or C# Source or
- .NET Assemblies: If you choose to generate a .NET assembly then you may select a key file for a Strong Named Assembly.
- C# Source: If you select C# source then you must select a relative directory. This folder will be created and cleaned upon each proxy generation.
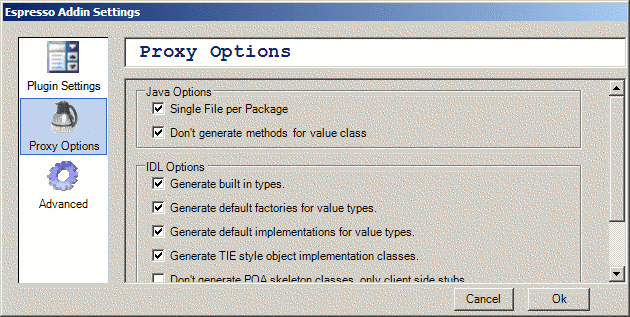
The Proxy Options dialog allows for the advanced configuration of the proxy generation process. Please refer to the Brewer Advanced Options.
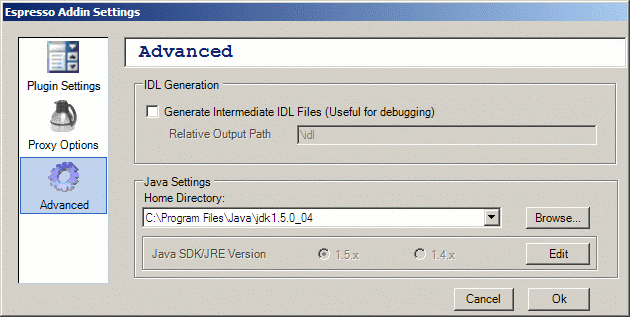
The Advanced options include setting the JDK/JRE version, location and the IDL Generation Options.
- IDL Generation Options: Selecting this will generate the IDL files in addition to the C# or Assembly output. You must specify a relative output directory.
- Java Settings: Please refer to the Advanced Brewer options for more information.