Accessing a Visual C++ EXE from Java

Accessing a Visual C++ EXE from Java |

|
This example demonstrates how to access a Visual C++ MFC EXE from Java. J-Integra® for COM is a Java interoperability component that bridges Java and Visual C++ MFC applications. It provides bi-directional access of Java objects and COM components.
You may read this example simply to get a feel for how easy it is to use J-Integra® to access COM components created from Microsoft Visual C++ 6.0. You can run the Java client on a Windows machine to access its local MFC COM component, or run the Java client on a non-Windows machine (such as Linux) to access MFC COM component installed on a remote Windows machine.
This example will require access to a machine that is running Windows, and has Visual C++ installed on it. This example assumes you are using Microsoft Visual Studio 6.0.
If you do wish to try out this example, you should first download and install the Java Developers Kit. You should also download and install the J-Integra® for COM.
We will be performing this example under D:\pure. Create that directory (if you have not already created it for the Excel example), and a pure2vc directory under it. Set your path environment variable to include the JDK and J-Integra® bin directories, and update your CLASSPATH environment to include the J-Integra® runtime:

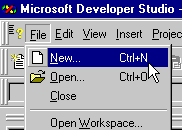
Start up Visual C++, and create a new project:
Create a project of type MFC AppWizard (exe), set the Location to D:\pure, and then set the Project name to vcproject -- the Location will be automatically updated to include the project name:
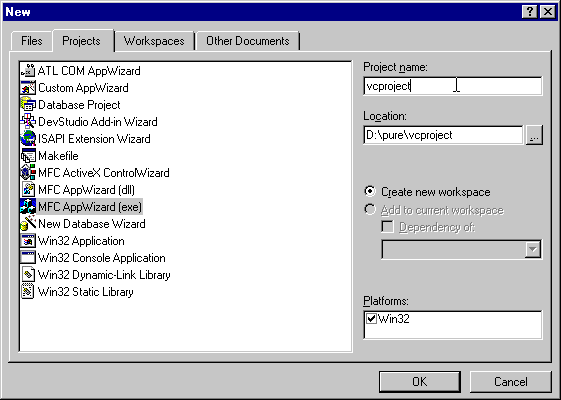
Click on OK, and on the next two pages Step 1 and 2, simply click on Next
On Step 3, enable Automation Support:
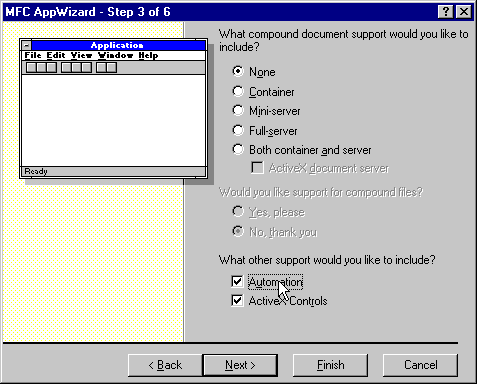
Click on Finish, and then click on OK to create the new project
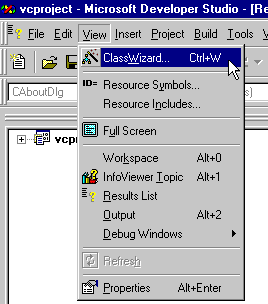
Start up the Class Wizard using View|Class Wizard:
Select the Automation pane:

Select the project document class CVcprojectDoc:
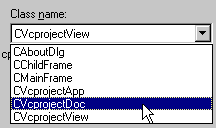
Click on the Add Method button to add a new method to the class:

Set the method name to meth1, set the return type to float, and specify two parameters p1 and p2, of types DATE and BSTR* (pointer to a String) respectively:
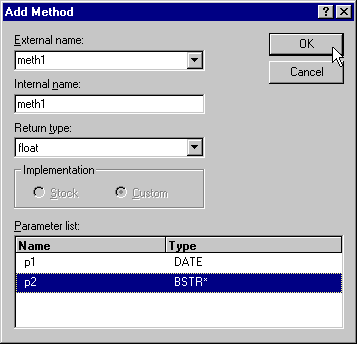
Click on OK
Click on the Add Method button to add a second method to the class:

Set the method name to meth2 and the return type to void (this method will be used to demonstrate an exception being thrown, so we don't need parameters or return types):
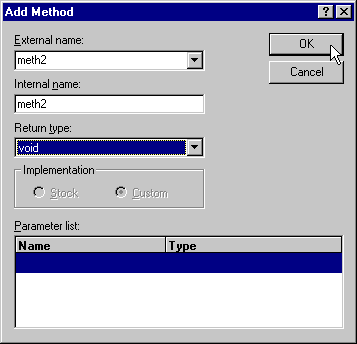
Click on OK
Click on the Add Property button to add a new property to the class:
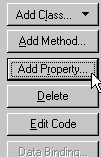
Set the new property name to prop1, set the return type to LPDISPATCH (a pointer to a COM Component), and select Get/Set methods for the implementation:
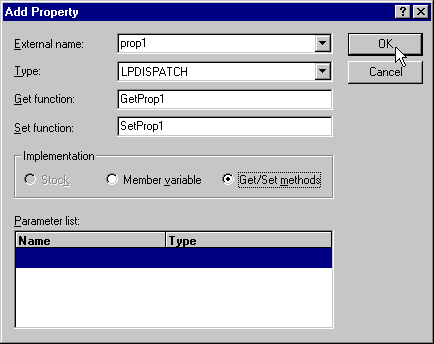
Click on OK
You will now create a new COM Component, instances of which will be returned by the prop1 property you just added. Click on the Add Class button, and select New...:

Set the class name to CMyClass, set the Base Class to CCmdTarget and select the Automation radio button. By deriving the class from CCmdTarget it can act as a COM Automation Component:
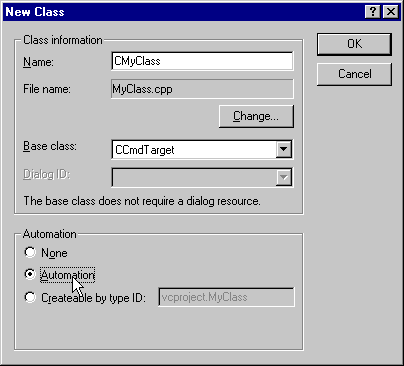
Click on OK
Click on the Add Method button to add a method to the new class:

Set the method name to add, set the return type to double, and define two parameters p1 and p2 of types float and double respectively:
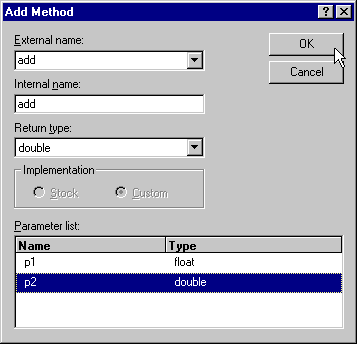
Click on OK
Click on OK to exit the Class Wizard, and on the left hand side of your screen, double-click on vcProjectClasses-CVcprojectDoc-meth1, to edit the implementation of that method:
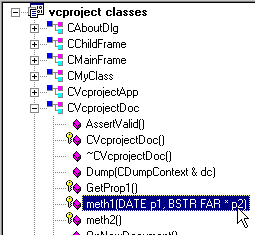
Update the implementation of meth1 to return 22/7, and to update the string parameter (p2) with a string representation of the first parameter (a date):
|
float CVcprojectDoc::meth1(DATE p1, BSTR FAR* p2) |
Update the implementation of meth2 to throw an exception:
|
void CVcprojectDoc::meth2() |
Update the implementation of GetProp1 to return a new instance of the MyClass class you created using the class wizard:
|
LPDISPATCH CVcprojectDoc::GetProp1() |
Move to the top of the file, and add #include "MyClass.h", so that we can use CMyClass from this file:

Double-click on vcProjectClasses-CMyClass-add, to edit the implementation of that method:
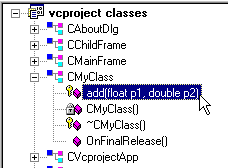
Update the implementation of add to return the sum of the two parameters:
|
double CMyClass::add(float p1, double p2) |
Build and execute your server using Build|Execute vcproject.exe. When asked if you wish to build, click on OK. By executing the server, you will register it so that we can configure access to it from DCOM. Once it has started running, you can immediately shut it down:
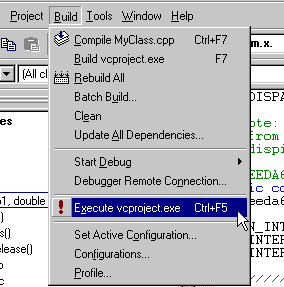
You can try this example on local Windows machine first to get a feel for how easy it is to use J-Integra® to access MFC COM component from Java. Once you make it working on local machine, you can then try to run the Java client on a non-Windows machine to remotely access MFC COM component on another Windows machine.
Use com2java to generate Java proxies which can be used to access the COM Component you just created from any standard JVM:
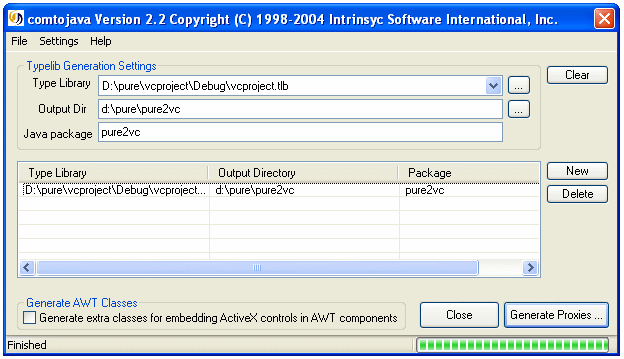
Create the file d:\pure\VcExample.java, by cutting and pasting from your Web Browser.
Here is the file.
import java.util.Date;
public class VcExample {
  public static void main(java.lang.String[] args) {
    try {
      com.linar.jintegra.Log.logImmediately(3, "jintegra.log");

      // DCOM authentication: Make sure NT DOMAIN, Nt USER, Nt PASSWORD are valid credentials.
      // Uncomment this line if VcExample.java remotely accesses MFC COM component:
      // com.linar.jintegra.AuthInfo.setDefault("NT DOMAIN", "USER", "PASSWORD");

      // Specify host name or IP address of MFC COM component machine as parameter if
      // VcExample.java remotely accesses MFC COM component.
      // pure2vc.Document doc = new pure2vc.Document("123.456.789.0");
      pure2vc.Document doc = new pure2vc.Document();

      // See how VC sees the date we pass it
      String[] dateStr = { "" };
      Date now = new Date();
      float result = doc.meth1(now, dateStr);
      System.out.println("VC says that 22/7=" + result);
      System.out.println("VC says that the date and time is " + dateStr[0]);
      System.out.println("Java thinks the date and time is " + now);
      // doc.meth2() returns a new object (you can't tell what type, from the type library)
      // -- we wrap it in the corresponding Java class, since we know what it really is
      pure2vc.MyClass myClass = new pure2vc.MyClass(doc.getProp1());
      double result2 = myClass.add(654.12F, 76.1234);
      System.out.println("The newly returned object says that 654.12 + 76.1234 = " + result2);
      myClass.release();

      // Now we will invoke a method which will deliberately throw an exception
      doc.meth2();
    } catch(Exception e) {
      e.printStackTrace();
    }
  }
} |
Compile the example using the javac VcExample.java command:
![]()
On the Java client machine, make sure your CLASSPATH and PATH environment variables are set up according to J-Integra® installation instructions. Compile and run the example in J-Integra®'s native mode (you need to use DCOM mode if remotely accessing MFC COM component):
javac VcExample.java
java -DJINTEGRA_NATIVE_MODE VcExample
You can also run the Java client on a remote machine, such as Linux, Solaris, UNIX and AIX. For instance, if you run it on a Linux machine, then you must do the following.: