Accessing COM Components from the NetDynamics Application Server

Java/J2EE COM Interoperability Products Page

This example demonstrates how to access COM Components from the NetDynamics Application Server. J-Integra® for COM is a Java interoperability component that bridges Java objects hosted on NetDynamics and Microsoft COM components. It provides bi-directional access of Java objects and COM components.

Summary

You may read this example simply to get a feel for how easy it is to use J-Integra® to access COM components from the NetDynamics Application server, however we urge you to try out this example. Although it appears that there are a lot of steps, most of them are trivial -- we have included such a lot of detail in order that no matter your experience, you will be able to follow the example.

The component you will create in this example is an Visual C++ ATL COM component in an Executable server.

Since J-Integra® can be used to access COM components from any JVM running on any platform, the NetDynamics application you create should execute in a NetDynamics Application Server running on any platform, including Solaris.

Introduction

The big picture of what is happening

Accessing COM Components from the NetDynamics Application Server: Overview

Prerequisites

  1. Prior to doing this example, please read the J-Integra® Excel example, since we introduce in that example some basic concepts that are assumed here.

  2. If you do wish to try out this example, you should first download and install the Java Developers Kit.

  3. You should download and install J-Integra®.

  4. You must also have installed the NetDynamics kit. This example assumes you are using NetDynamics version 4.1.2

  5. This example requires access to a machine that is running Windows NT and has Visual C++ installed on it.

  6. This example assumes you are using Visual Studio 97.

  7. This example assumes that you have installed the JDK under D:\JDK1.3.1, J-Integra® under D:\jintegra, and NetDynamics under D:\NetDynamics.

  8. The example also assumes that the directory D:\pure exists. If it does not exist, please create it.

The steps involved

  1. Create the Visual C++ COM Component

  2. Generate the Java proxies for the component

  3. Configure DCOM access to the component

  4. Configure NetDynamics environment variables

  5. Create a NetDynamics project which accesses the component

  6. Try out your new application

Create the Visual C++ COM Component

  1. Start up Visual C++, and create a new project.

  2. Create a project of type ATL COM AppWizard, enter D:\pure as the the Location, and enter inventory as the Project name -- the Location will be automatically updated to include the project name:
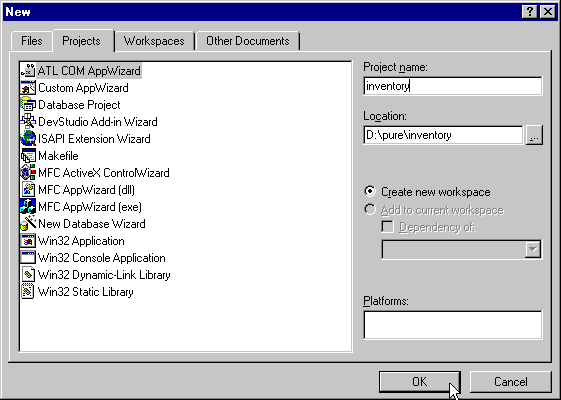
    Accessing COM Components from the NetDynamics Application Server: Create new project

    Click OK.

  3. In Step 1, set the Server Type to Executable:
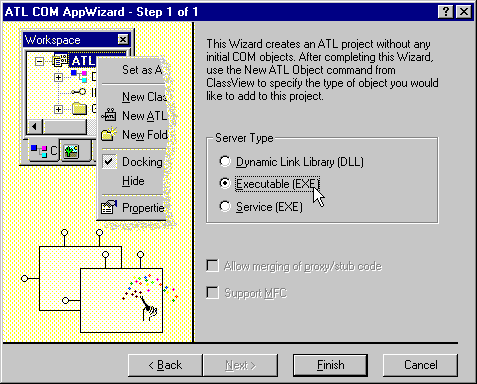
    Accessing COM Components from the NetDynamics Application Server: Set the server type

    Click on Finish, and then click OK to create the new project

  4. To create a new ATL Object, click Insert>New ATL Object:
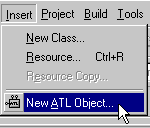
    Accessing COM Components from the NetDynamics Application Server: Create new ATL object

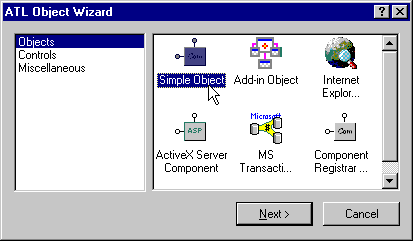
  5. Click the Simple Object icon:

    Accessing COM Components from the NetDynamics Application Server: Click the simple object icon

    Click Next.

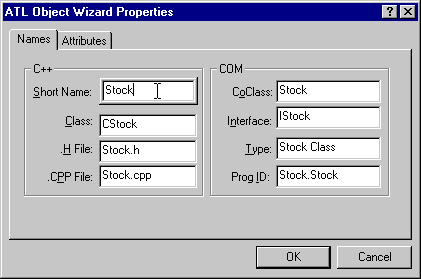
  6. Enter Stock as the Short Name:

    Accessing COM Components from the NetDynamics Application Server: Enter a short name

    Click OK.

  7. Click inventory classes. Right-click on IStock, and select Add Method to add a new method to the interface:
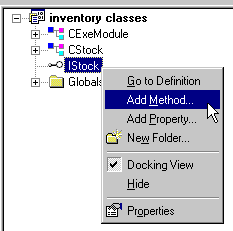
    Accessing COM Components from the NetDynamics Application Server: Add a new method

  8. Enter quantity as the Method Name, and enter [in] BSTR item, [out] long* amount as the Parameters:
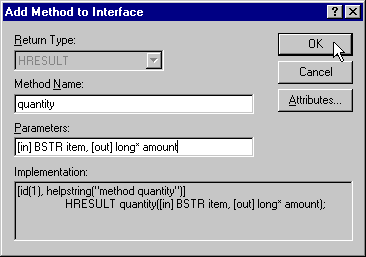
    Accessing COM Components from the NetDynamics Application Server: Edit method details

    Click OK

  9. Click IStock to expand the tree. Double click quantity(BSTR item, long * amount), to bring up the corresponding code:
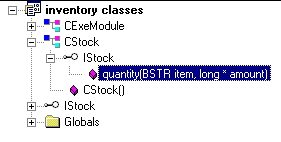
    Accessing COM Components from the NetDynamics Application Server: Enter code for 'quantity' method

  10. Update the implementation of the quantity method.

    As you may have guessed, we are creating a simple business-logic type component, representing an inventory system. The quantity method can be used to determine how many instances of a specific item in stock. In this example the inventory is somewhat depleted, and indeed the only item that still appears to be in stock is aardvarks:

    // Stock.cpp : Implementation of CStock
    #include "stdafx.h"
    #include "inventory.h"
    #include "Stock.h"
    #include "COMDEF.H"

    ////////////////////////////////////////////////////////
    // CStock
    STDMETHODIMP CStock::quantity(BSTR item, long * amount)
    {
      _bstr_t theItem = item;

      if(strcmp(theItem, "aardvark") == 0) {
         *amount = 12;
      } else {
         *amount = 0;
      }

      return S_OK;
    }

  11. To build your server, click the Build menu, then click Build inventory.exe:

    Accessing COM Components from the NetDynamics Application Server: Build inventory.exe

    The status window will indicate a succesful build and registration of your server:
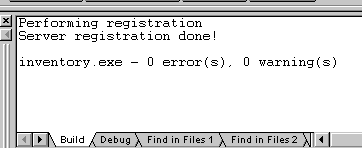
    Accessing COM Components from the NetDynamics Application Server: View build status

Generate the Java proxies for the component

Read the Excel Example for a full description of what is happening here.

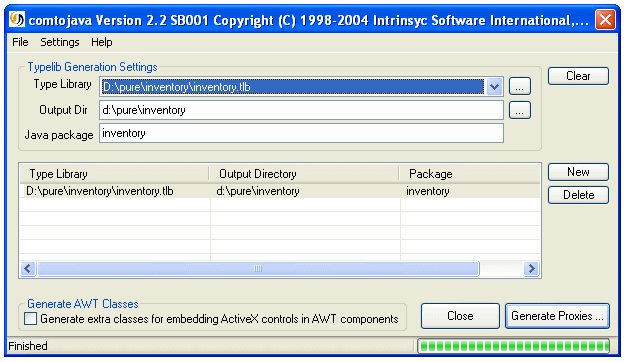
  1. Use the com2java tool to generate Java proxies which can be used to access the COM Component you just created, from any standard JVM:
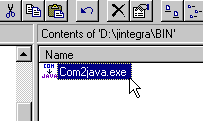
    Accessing COM Components from the NetDynamics Application Server: Generate proxies

  2. Open D:\pure\inventory\inventory.tlb as the type library -- this file was automatically created by Visual C++ when you built your project:
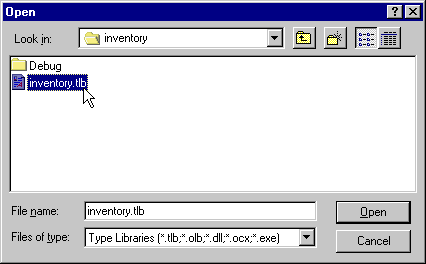
    Accessing COM Components from the NetDynamics Application Server: Select the type library

  3. Enter D:\pure as the output directory

  4. Enter inventory as the java package
  5. Click the Generate Proxies button

Accessing COM Components from the NetDynamics Application Server: Click generate

You may wish to examine the three files that were generated:

Configure DCOM access to your COM Component

Please read Configuring DCOM for Remote Access for details on configuring DCOM. You should change the properties on your COM Component, which will be listed under Stock Class:
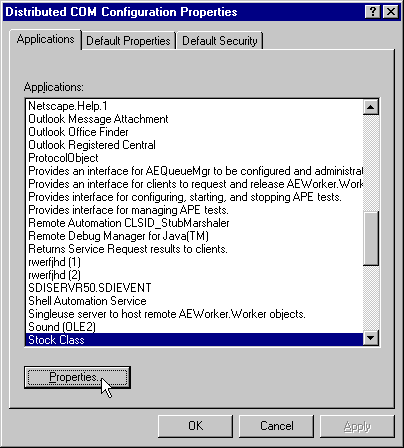
Accessing COM Components from the NetDynamics Application Server: Edit DCOMCNFG settings

Configure NetDynamics environment variables

  1. Click the Start button, then click Settings>Control Panel. Double click the System icon. Click the Environment tab, and select NETDYN_CLASSPATH from the System Variables:
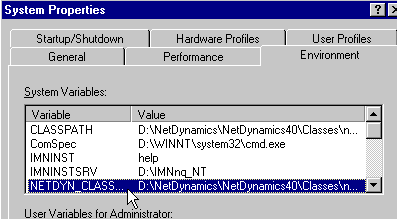
    Accessing COM Components from the NetDynamics Application Server: Edit NETDYN_CLASSPATH settings

  2. Append ;d:\jintegra\lib\jintegra.jar;d:\pure to the definition of the variable, and click on Set and then Apply:
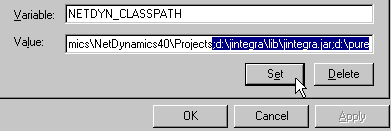
    Accessing COM Components from the NetDynamics Application Server: Apply settings

  3. Reboot your machine in order for the changes to take effect.

Create a NetDynamics project which accesses the component

  1. Start the NetDynamics studio, and create a new project:
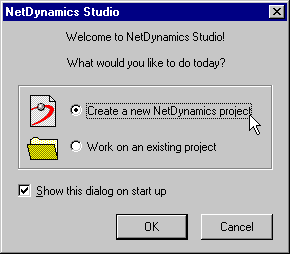
    Accessing COM Components from the NetDynamics Application Server: Create new NetDynamics project

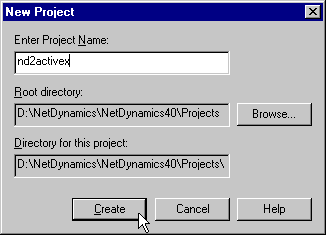
  2. Set the Project Name to nd2activex

    Accessing COM Components from the NetDynamics Application Server: Set project name

    Click Create.

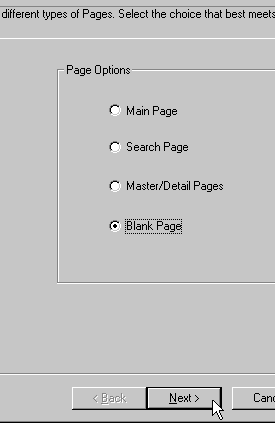
  3. Start with a blank page

    Accessing COM Components from the NetDynamics Application Server: Start with blank page

    Click Next and Finish.

  4. Change the Name of the new page in its properties page to NetDynamics2COM:
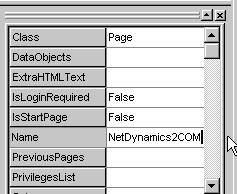
    Accessing COM Components from the NetDynamics Application Server: Change page name

  5. Click the HTML tab to use the HTML tools:
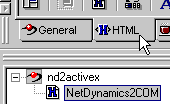
    Accessing COM Components from the NetDynamics Application Server: Click the HTML tab

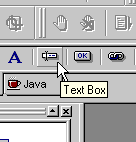
  6. Create a new Text Box:

    Accessing COM Components from the NetDynamics Application Server: Create new TextBox

  7. Use the new text box's property page to set its Label and Name to Item:
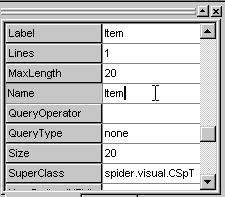
    Accessing COM Components from the NetDynamics Application Server: Edit TextBox properties

  8. Create a new Button:

    Accessing COM Components from the NetDynamics Application Server: Create a new Button

  9. The button's action will be a Built-in Action:
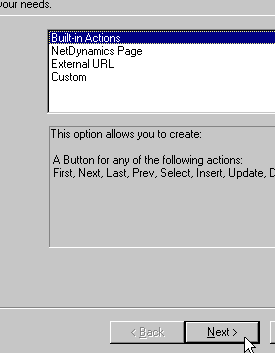
    Accessing COM Components from the NetDynamics Application Server: Select Built-in Action

    Click on Next.

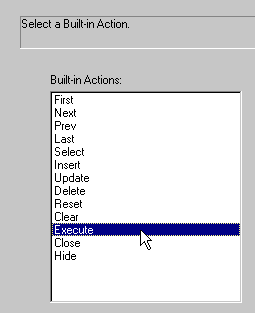
  10. Select the Execute Built-in Action:

    Accessing COM Components from the NetDynamics Application Server: Select Execute Built-in Action

    Click Next.

  11. Set the Format String to Inventory:

    Accessing COM Components from the NetDynamics Application Server: Set Format String to Inventory

    Click Next.

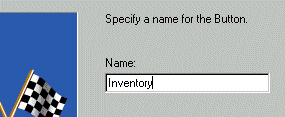
  12. Set the Name to Inventory:

    Accessing COM Components from the NetDynamics Application Server: Set Name to Inventory

    Click Finish.

  13. Click the new button's Event tab, and double-click on OnWebEvent to bring up the code that is invoked when the user submits the form by clicking on the button:
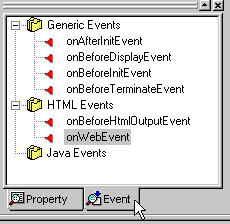
    Accessing COM Components from the NetDynamics Application Server: Edit OnWebEvent code

  14. Modify the code as follows. The lines in bold are lines to be added. Don't forget to change the domain, user and password to be used to access the component.

    In real life, you would not hard code the domain, user and password. In addition, you might create and store the reference to the Inventory COM component at the User Session or Global level, so that it is not created and released with every request.

    // This file has been generated by NetDynamics Studio

    package nd2activex;

    import java.awt.event.*;
    import spider.event.*;
    import spider.database.*;
    import spider.visual.*;
    import spider.util.CSpLog;

    import com.linar.jintegra.AuthInfo;


    //[[SPIDER_CLASS BEGIN
    public class NetDynamics2COM extends spider.visual.CSpPage
    //]]SPIDER_CLASS END
    {
    //[[SPIDER_EVENTS BEGIN

    //[[SPIDER_EVENT
    public int Inventory_onWebEvent(CSpWebEvent event)
    {
    // Get the form field value

    String item = getDisplayFieldValue("Item").toString();


    try {

    // Uncomment this line if not running under Windows. Use DCOMCNFG to grant default

    // launch and access permissions for the user.

    // AuthInfo.setDefault("nt domain", "user", "password");


    // Change localhost to another host name if you wish to access

    // a COM component on a remote host.

    inventory.Stock stock = new inventory.Stock("localhost");


    // Single elt array, since it is passed by reference

    int[] amount = { 0 };


    // Invoke the the method in the COM component, it throws an exception on error.

    stock.quantity(item, amount);


    CSpLog.send(this,

    CSpLog.ERROR,

    "COM example worked. We have " + amount[0] + " " +

    item + "(s) in stock.");


    // Standard garbage collection would also release it eventually

    stock.release();

    } catch(java.io.IOException ioe) {

    CSpLog.send(this,

    CSpLog.ERROR,

    "IO Exception talking to COM Component:" + ioe);

    }


    int command = PROCEED;
    command = doAction(event);
    return(command);
    }
    //]]SPIDER_EVENT

    //]]SPIDER_EVENTS END
    }

  15. Build the project by clicking Build>Compile All:
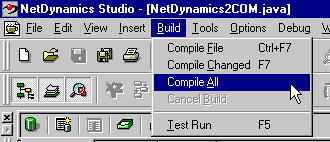
    Accessing COM Components from the NetDynamics Application Server: Build project


Run the example

Run the example by clicking Build>Test Run:
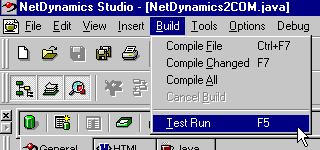
Accessing COM Components from the NetDynamics Application Server: Run the example

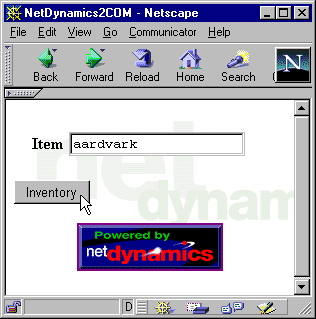
Your Web Browser should start up. You can now query the inventory system:

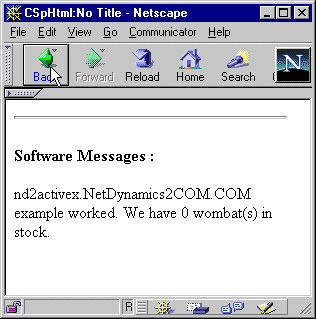
Any Wombats?
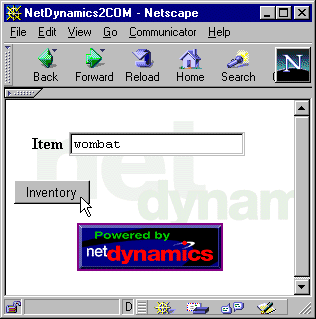
Accessing COM Components from the NetDynamics Application Server: Query for wombats

No!
Accessing COM Components from the NetDynamics Application Server: No wombats found

How about Aardvarks?
Accessing COM Components from the NetDynamics Application Server: Query for aardvarks

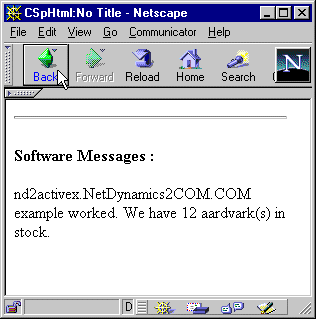
Yes!
Accessing COM Components from the NetDynamics Application Server: 12 aardvarks found