Borland Inprise Application Server (Delphi variant) Accessing EJBs

Borland Inprise Application Server (Delphi variant) Accessing EJBs |

|
Having read this article you will have a clear
understanding of how easy it is for software written in languages supporting
COM to access CORBA objects, including Enterprise JavaBeans
Java
Click here to see a Delphi equivalent of this article.
In order to access EJBs from Visual Basic you will use J-Integra®. J-Integra® allows pure Java objects to access COM objects, and it allows languages which support COM to communicate with pure Java objects. J-Integra® achieves this by incorporating a pure Java implementation of Distributed COM (DCOM), the COM network protocol.
Although you are going to use Visual Basic to access pure Java EJBs, you could in fact use any language which supports COM, such as Visual C++.
At this point I would like to emphasize that this requires no alteration to the EJB or supporting files, the same EJB may be accessed from pure Java and Visual Basic.
The following diagram illustrates three different interactions between the Visual Basic client, and Java objects:
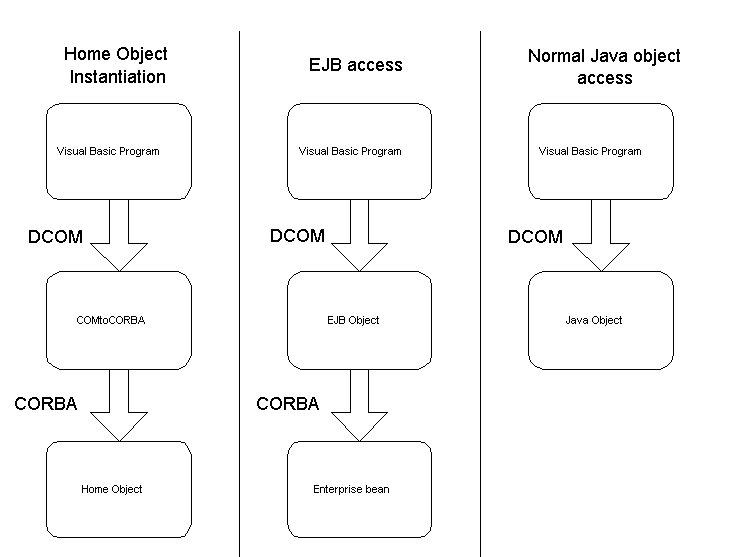
Home Object Instantiation - The VB client interacts with a COMtoCORBA Java object (created below), which instantiates a Home Object and returns a reference to it to the Visual Basic client program.
EJB Access - Once Visual Basic has a reference to the Home Object, it may call any of the create or find methods on the Home Object to obtain references to one or more EJB Objects (proxies). Communication with an EJB Object from Visual Basic is performed using DCOM, the communication between the proxy EJB Object and the actual enterprise bean is, as usual for IAS, performed using CORBA.
Now that you have an overview of the architecture, you can try out a working example.
The following items are required before you try out the example:
An installation of IAS 4.0 on any platform (such as UNIXTM or Windows)
The example is based on the EJB instructors example which is part of the IAS installation. You must have the instructor example working using the standard Java client which is part of the example, before proceeding.
By default the instructors example is installed in \Inprise\AppServer\examples\ejb\instructors
The Server Machine: describes the steps to be performed on the server machine on which IAS and J-Integra® are installed, which may be any platform supporting IAS.
The Client Machine: describes the steps to be performed on the client machine, which must be a Windows machine and must have Visual Basic installed. The Step-by-Step example
Extra step¡ªUsing early binding with Visual Basic
You may of course run both client and server on the same machine.
Start IAS.
Start the EJB container with the instructors EJB, as suggested in the instructors README file, using the following command:
vbj com.inprise.ejb.Container ejbcontainer instructors_beans.jar -jns -jts -jdb
Create a new directory and in it create a file called COMtoCORBA.java, with the following contents:
		import javax.naming.*;
		import com.linar.jintegra.Jvm;
		import com.linar.jintegra.AutomationException;
		import com.linar.jintegra.Instanciator;
		public class COMtoCORBA {
		  public static void main(String[] args) throws Exception {
		    Jvm.register("InstructorJvm", new CorbaInstanciator());
		    while (true) { // endless loop to keep the bridge alive
		      Thread.sleep(10000000);
		    }
		  }

		  public Object narrow(Object narrowFrom, String narrowTo)
		                                 throws AutomationException {
		    try {
		      return javax.rmi.PortableRemoteObject.narrow(narrowFrom,
		                                                   Class.forName(narrowTo));
		    } catch (ClassNotFoundException e) {
		      e.printStackTrace();
		      throw new AutomationException(e);
		    }
		  }
		}
		class CorbaInstanciator implements Instanciator {
		  Context ctx;
		  CorbaInstanciator() throws NamingException {
		    ctx = new InitialContext();
		  }
		  // This method is called by the J-Integra® runtime when a COM client tries
		  // to instantiate an object.  We have special handling if the object is a CORBA object
		  public Object instanciate(String javaClass) throws AutomationException {
		    try {
		      try {
		        return Class.forName(javaClass).newInstance();
		      } catch(Exception e) {}
		      return ctx.lookup(javaClass);
		    } catch (Throwable t) {
		      t.printStackTrace();
		      throw new AutomationException(new Exception("Unexpected: " + t));
		    }
		  }
		}
|
This is the COMtoCORBA bridge mentioned in the overview.
Make sure that the J-Integra® runtime file jintegra.jar, which is located in the lib directory of your J-Integra® installation is in your CLASSPATH environment variable, and compile the file COMtoCORBA.java using the vbjc command provided in the IAS bin directory:
vbjc COMtoCORBA.java
To run COMtoCORBA you need to add the instructors_beans.jar file to your CLASSPATH. This file is located with the other instructors files in the IAS installation. Run COMtoCORBA using the vbj command provided in the IAS bin directory:
vbj -VBJprop JINTEGRA_DCOM_PORT=1333 COMtoCORBA
The property JINTEGRA_DCOM_PORT specifies a TCP/IP port used by the J-Integra® runtime to receive DCOM requests. It must match the port used in the 'regjvmcmd' command on the client machine, as you will see later.
If you do not have J-Integra® installed on your client machine, copy the files jintmk.dll and regjvmcmd.exe from the bin directory of your J-Integra® installation on the server to a directory on the client.
Open a DOS console on the client machine and change directory to the directory into which you copied the two files. Then tell J-Integra® about the location of the JVM, and the name used to access it. You will need to know the TCP/IP host name of the server machine. If it is the same machine as the client machine, then use localhost, otherwise use the appropriate host name. Run regjvmcmd as follows:
regjvmcmd InstructorJvm yourservermachinename[1333]
Start Visual Basic and create a new standard.exe project. Modify the initial form to look similar to the following:
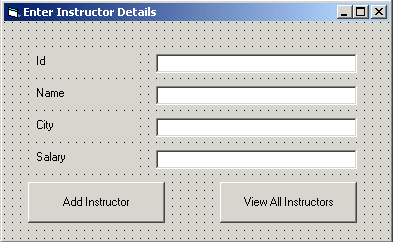
Please note:
- The Id TextBox must have
its name property set to "Id"
- The Name TextBox must have
its name property set to "InstructorName"
- The City TextBox must have
its name property set to "City"
- The Salary TextBox must
have its name property set to
"Salary"
- The Add Instructor button
must its name property set to
"Add"
- The View All Instructors
button must have its name property
set to "View"
- The form itself must have its name
property set to "InstructorEntry"
Double click the Add Instructor button and replace the code in the editor with this code:
		Dim Bridge As Object
		Private Sub Form_Load()
		    Set Bridge = GetObject("InstructorJvm:COMtoCORBA")
		End Sub
		' Inserting an Instructor record
		Private Sub Add_Click()
		    Set NewAddress = GetObject("InstructorJvm:Address")
		    Set InstructorHome = Bridge.narrow(GetObject("InstructorJvm:instructors"), _
		                                       "InstructorHome")

		    ' We are only storing the city in the Address
		    NewAddress.setCity City.Text

		    On Error Resume Next
		    ' The Social security number and department are left as 0 and blank
		    InstructorHome.Create Id.Text, InstructorName.Text, 0, NewAddress, "", _
		                          Salary.Text
		    If Err.Number  0 Then
		        MsgBox Err.Description
		    Else
		        MsgBox "Instructor " + InstructorName.Text + " added successfully"
		    End If
		End Sub
		' Viewing all instructor records
		Private Sub View_Click()
		    Dim AllInstructorsDialog As New AllInstructors
		    Dim AllInstructorsCollection As Collection
		    Set SearchAddr = GetObject("InstructorJvm:Address")
		    Set InstructorHome = Bridge.narrow(GetObject("InstructorJvm:instructors"), _
		                                       "InstructorHome")

		    Set AllInstructorsCollection = InstructorHome.findByAddress(SearchAddr)

		    ' Note how the search results are accessed as a Visual Basic collection
		    For Each Instructor In AllInstructorsCollection
		        Set Instructor = Bridge.narrow(Instructor, "Instructor")
		        AllInstructorsDialog.Instructors.AddItem Instructor.getName()
		    Next

		    AllInstructorsDialog.Show
		End Sub
|
Add a new form and modify it to look like this, the large white window is a ListBox:
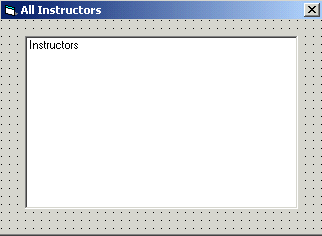
Please Note:
- The ListBox must have its name
property set to "Instructors"
- The form must have its name
property set to "AllInstructors"
You are now ready to run your project. Hit the F5 key and you should see the following:
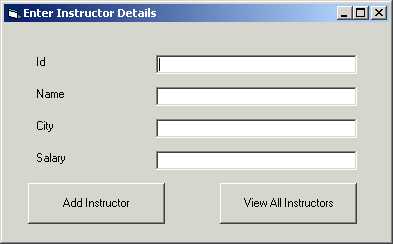
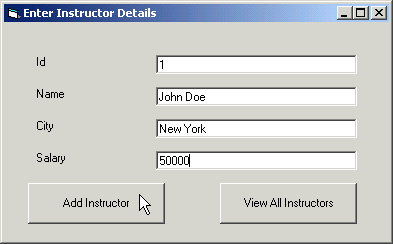
Enter the data as shown below and click
on the Add Instructor button:
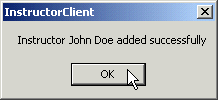
You should get confirmation of your input,
click OK:
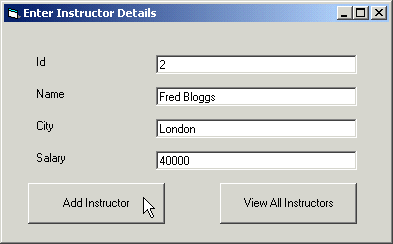
Change the data in the form to the following and click on the Add Instructor button:
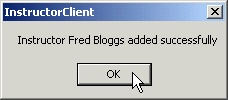
You should get confirmation of your input, click OK:
Click the View All Instructors button and you should see the list of all instructors:
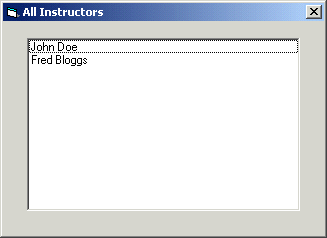
Close the All Instructors form and click the Add Instructor button to add the same Instructor again, you should receive this message from the database:

Those of you familiar with using COM in Visual Basic will know that it supports both early and late binding to COM objects. The example so far has used late binding.
The next steps show you how to use early binding with J-Integra®. Early binding has the advantages that the type information for the Java object is available within the Visual Basic environment, and the runtime performance is increased.
Again the steps are divided into those performed on the server machine and those performed on the client machine.
Make sure that the files jintegra.jar and instructor_beans.jar are in your CLASSPATH as for the late binding example.
From the directory containing your COMtoCORBA files, run the java2com tool as follows:
vbj com.linar.java2com.Main
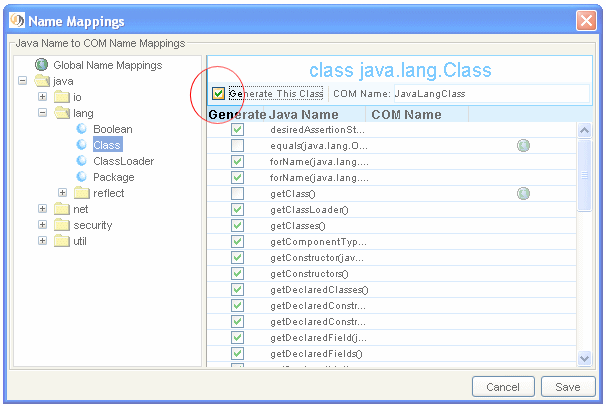
Click on the Settings menu, select the Names menu item. Select java.lang.Class from the left pane, and click 'Generate This Class' on the top of the right panel. Normally methods which use the java.lang.Class class are ignored by java2com, but since some CORBA interfaces use this type, we must add this class back to the proxy generation.
Enter the following in the input fields
of java2com, and click Generate
:
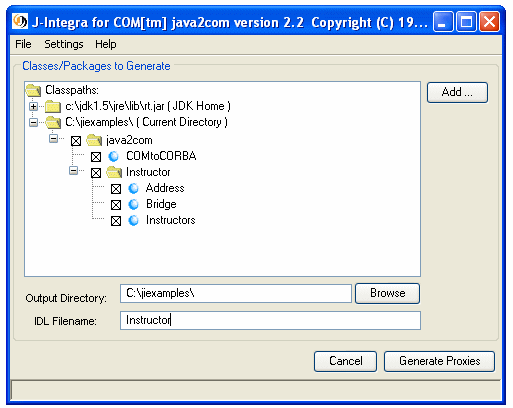
Once the generation is finished, close the dialog. You have just generated code used by the J-Integra® runtime to map DCOM requests from COM clients into corresponding method invocations on Java objects. You have also generated a COM Interface Definition Language (IDL) file called instructor.idl, which is used below.
Compile the generated code :
vbjc IID*.java
Start COMtoCORBA running, as before:
vbj -VBJprop JINTEGRA_DCOM_PORT=1333 COMtoCORBA
Copy the file instructor.idl, which was just generated on the server using java2com, to the client machine.
You require the Microsoft IDL compiler (midl.exe) to compile your COM IDL. Midl.exe is part of the Visual C++ installation. Visual C++ also includes the command vcvars32.bat which will set up the environment variables required to run midl.exe. From the directory containing instructor.idl, run the following command to compile the COM IDL into a COM Type Library (instructor.tlb).
midl instructor.idl
To use early binding you require one more file on the client. If you do not have J-Integra® installed on the client, copy the file regtlb.exe from the bin directory of your J-Integra® installation on the server to the same directory on the client in which you placed jintmk.dll and regjvmcmd.exe. Register instructor.tlb:
regtlb <full path to instructor.tlb> InstructorJvm
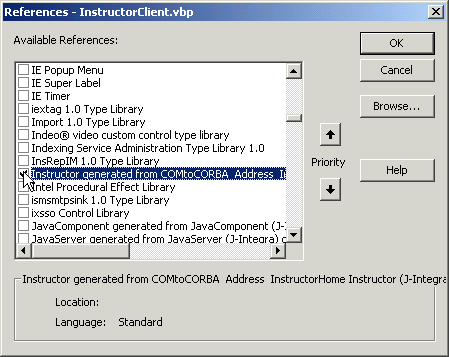
Open up the VB project you created earlier. From the menu select Project>References... Check the box labelled Instructor generated from COMtoCORBRA Address ... (J-Integra®) on ..., click OK:
Now you have access to the type library information for your Java objects in Visual Basic. Replace the complete code for your InstructorEntry.frm with the following code which takes advantage of the type library information. In bold you will see the objects being declared of a specific type (rather than just Object):
		Dim Bridge As New Instructor.COMtoCORBA
		' Inserting an Instructor record
		Private Sub Add_Click()
		    Dim NewAddress As New Instructor.Address
		    Dim InstructorHome As InstructorHome
		    Set InstructorHome = Bridge.narrow(GetObject("InstructorJvm:instructors"), _
		                         "InstructorHome")

		    ' We are only storing the city in the Address
		    NewAddress.setCity City.Text

		    On Error Resume Next
		    ' The Social security number and department are left as 0 and blank
		    InstructorHome.Create Id.Text, InstructorName.Text, 0, NewAddress, "", _
		                          Salary.Text
		    If Err.Number  0 Then
		        MsgBox Err.Description
		    Else
		        MsgBox "Instructor " + InstructorName.Text + " added successfully"
		    End If
		End Sub
		' Viewing all instructor records
		Private Sub View_Click()
		    Dim AllInstructorsDialog As New AllInstructors
		    Dim AllInstructorsCollection As Collection
		    Dim SearchAddr As New Instructor.Address
		    Dim InstructorHome As InstructorHome
		    Dim CurrentInstructor As Instructor.Instructor

		    Set InstructorHome = Bridge.narrow(GetObject("InstructorJvm:instructors"), _
		                                       "InstructorHome")

		    Set AllInstructorsCollection = InstructorHome.findByAddress(SearchAddr)

		    ' Note how the search results are accessed as a Visual Basic collection
		    For Each AnInstructor In AllInstructorsCollection
		        Set CurrentInstructor = Bridge.narrow(AnInstructor, "Instructor")
		        AllInstructorsDialog.Instructors.AddItem CurrentInstructor.getName()
		    Next

		    AllInstructorsDialog.Show
		End Sub
|
For the second time you are ready to run your project, hit F5 and try it out.