Accessing EJBs Hosted in WebSphere from ASP

Accessing EJBs Hosted in WebSphere from ASP |
|
In this example you will see how to access Enterprise Java Beans hosted in the WebSphere application server.
WebSphere enables companies to develop, deploy and integrate next-generation e-business applications, such as those for business-to-business e-commerce, and supports business applications from simple Web publishing through enterprise-scale transaction processing. To find out more about it go to http://www.ibm.com/websphere.
This example is based on the Account EJB sample that comes with the default installation of IBM's WebSphere Application Server.
In this example, IBM demonstrates a persistent entity bean that models banking accounts. Here, we'll use the same example but instead of using a Java Servlet as the client, we use an ASP client.
You will need an installation of WebSphere, including the samples that are distributed with it. Follow the instructions in the WebSphere documentation to run the Account EJB example and make sure it works.
Also ensure that you have installed the J-Integra® license.
Create the file ComToWebSphere.java with the following content:
import javax.naming.*;
import java.util.Hashtable;

import com.linar.jintegra.*;

public class ComToWebSphere {

  public ComToWebSphere() {
  }

  public void registerJVMandSleep() {
    try {
      // For COM access to objects loaded via JNDI lookup
      //com.linar.jintegra.Log.logImmediately(3, System.err);
      Jvm.register("wsejb", new EjbInstanciator());
      while (true) {
        Thread.sleep(5000);
      }
    } catch (Exception eX) {
      System.err.println("Exception: " + eX.getMessage());
    }
  }

  class EjbInstanciator implements Instanciator {
    Context ctx;

    EjbInstanciator() throws NamingException {
      Hashtable env = new Hashtable(11);
      env.put(Context.INITIAL_CONTEXT_FACTORY, "com.ibm.websphere.naming.WsnInitialContextFactory");
      env.put(Context.PROVIDER_URL, "iiop://localhost:900");
      ctx = new InitialContext(env);
    }

    public Object instanciate(String javaClass) throws AutomationException {
      try {
        System.err.println("Class requested is..." + javaClass);
        if (findSlash(javaClass)) {
          Object obj = ctx.lookup(javaClass);
          return obj;
        }
        return Class.forName(javaClass).newInstance();
      } catch (Throwable t) {
        t.printStackTrace();
        throw new AutomationException(new Exception("Unexpected: " + t));
      }
    }

  }

  protected boolean findSlash(String s) {
    char[] characters = s.toCharArray();
    for (int i = 0; i < characters.length; i++) {
      if (characters[i] == '/') {
        return true;
      }
    }
    return false;
  }

  public static void main(String[] args) {
    ComToWebSphere bridge = new ComToWebSphere();
    bridge.registerJVMandSleep();
  }
}
|
To run this bridge, first you need to setup your environment. The following batch file will do that for you. Make sure modify this script to set WAS_HOME and DB2DRIVER to the right values.
@rem +--------------------------+ @rem | Run Account Application | @rem +--------------------------+ @echo off setlocal @rem +-----------------------------------------------------------+ @rem | Change these variables to the right values for your system | @rem +-----------------------------------------------------------+ SET WAS_HOME=d:\WebSphere\AppServer SET DB2DRIVER=d:\WebSphere\AppServer\lib\idb.jar @rem +-------------------------------------------------------------+ @rem | This assumes you installed Java along with the App Server, | @rem | so that all JDK binaries, etc, will be under App Server | @rem | directories. | @rem +-------------------------------------------------------------+ SET JAVA_HOME=%WAS_HOME%\java SET CLIENTSAS=-Dcom.ibm.CORBA.ConfigURL=file:/d:/WebSphere/AppServer/properties/sas.client.props SET SERVERSAS=-Dcom.ibm.CORBA.ConfigURL=file:/d:/WebSphere/AppServer/properties/sas.server.props SET QUALIFYNAMES=-qualifyHomeName @rem +----------------------+ @rem | Setup the classpath. | @rem +----------------------+ set WAS_CP=%WAS_HOME%\lib\websphere.jar;%WAS_HOME%\lib\CORBA.jar @rem +----------------------------------------------------------------------+ @rem | JDK assumed installed with App Server, under App Server directories. | @rem | Pre-pend system PATH so that binaries for this JDK will be used. | @rem +----------------------------------------------------------------------+ set PATH=%JAVA_HOME%\bin;%PATH% @rem +--------------------------------------------------------------------------------+ @rem | Relevant enterprise beans must be deployed, and copies of resulting jar files | @rem | must be on the local machine, even if the actual App Server machine is remote. | @rem +--------------------------------------------------------------------------------+ set JARS_NEEDED=%WAS_HOME%\installedApps\Samples.ear\AccountAndTransferEJBean.jar @rem +-------------------------------+ @rem | Finally, run the bridging JVM.| @rem +-------------------------------+ %JAVA_HOME%\bin\java -classpath .;%WAS_CP%;%JARS_NEEDED%;d:\asp_java\lib\jintegra.jar; -DJINTEGRA_DCOM_PORT=7051 ComToWebSphere endlocal |
Compile the bridge and then run it:
>javac ComToWebSphere.java
>runjvm
On the ASP client machine, tell J-Integra® about the location of the JVM, and the name that can be used to access Java objects through it. You will need to know the TCP/IP host name of the machine running the bridge you just started. If it is the same machine as the ASP client, then use 'localhost', otherwise use the appropriate host name:
> D:\asp_java\bin\regjvmcmd.exe localhost[7051]
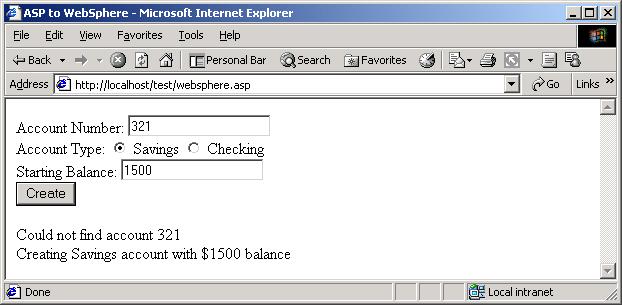
Create an ASP page with the following contents:
<%@ LANGUAGE = VBSCRIPT %>
<html><head><title>ASP to WebSphere</title></head><body>
<FORM METHOD=POST ACTION="websphere.asp">
Account Number: <INPUT TYPE="text" NAME="account"><br>
Account Type: <INPUT TYPE="radio" NAME="type" checked value="1"> Savings:
			   <INPUT TYPE="radio" NAME="type" value="0"> Checking<br>
Starting Balance: <INPUT TYPE="text" NAME="balance"><br>
<INPUT TYPE="submit" value="Create">
</FORM>
<%
id = Request.Form("account")
acctype = Request.Form("type")
accbalance = Request.Form("balance")
If not id = "" Then
		Set home = GetObject("wsejb:WSsamples/AccountHome")
		Set key = GetObject("wsejb:WebSphereSamples.AccountAndTransfer.AccountKey")
		On Error Resume Next
		key.AccountID = id
		Set account = home.findByPrimaryKey(key)
		If Err.Number <> 0 Then
			Response.write "Could not find account " & id & "<br>"
			Response.write "Creating "
			If acctype = 1 Then
				Response.write "Savings"
			Else
				Response.write "Checking"
			End If
			Response.write " account with $" & accbalance & " balance<br>"
			Set account = home.Create(key, acctype, accbalance)
		Else
			Response.write "Account " &id & " already   exists. Balance: $" & account.getBalance()
		End If
	End If

%>
</body></html>
|
To make this file available on a web browser please follow the instructions in the Accessing a Simple Java Class from Active Server Pages example.
If you are running ASP under Windows 2000 configure the virtual directory to have an Application Protection setting of Low(IIS Process).
Open the ASP page in your browser. You should see the following:
Now you can create an account using the EJB hosted in WebSphere.